Recently I had the need to setup easy auth using Azure B2C to authenticate users across a frontend Azure Web App and an Azure Functions backend. Allthough it sounds like a regular scenario, the documentation I found could have been better. I don’t have the time to write the complete docs, but this blogpost will outline the steps, so I can remember it for next time, and hopefully to enable you to do the same kind of setup. Let’s get cracking.
Applications
I will assume the Azure AD B2C has been provisioned, and if it is not, there is pleanty of documentation on that part. From there you first need to set up the frontend and backend as seperate applications in the AD.
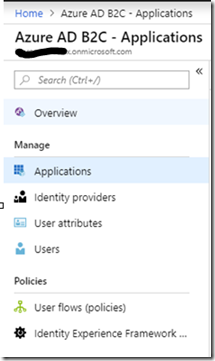
In the Azure portal go to the Azure AD B2C and select applications. Here we have to setup the frontend and the backend respectively. Click add and enter a name for the application and choose “include web app / web API” for both applications.

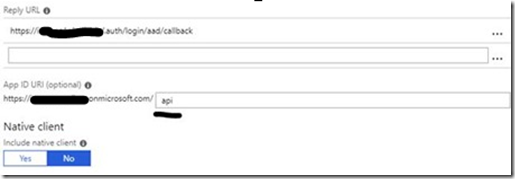
For each application select it in the application list and setup the reply URL to point to the call back. The url should point to https.//<mysitesurl>/.auth/login/aad/callback.
For the frontend select the keys section and generate a key. Write it down, as you cannot retrieve it later and it is needed at a later step.
For the backend provide an App Id URI

Published scopes and API Access
Next the backend is setup to define access scopes. To do this select the backend application and go to published scopes.
Enter a name for a new scope and write down the full scope value, which you will need later.

To require access to the backend the frontend needs to set up API Access. To do this select the frontend application and go to API acces.
Click add and select the api you you just published. Check the scopes you wish to have access to.
User flows custom design
As an optional step, but something you will most likely need we will now set up a custom design.
Upload the custom design to blob storage using the portal by going to the storage account and selecting blobs. Create one if it does not already exist. Upload the static design files and note down the url’s for the login and reset pages.
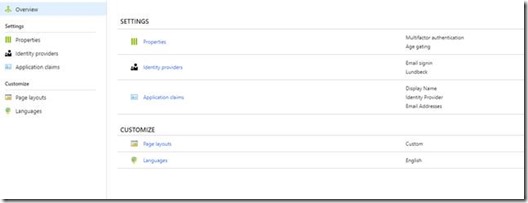
From the Azure AD B2C overview choose user flows.
Create a Sign in v2 flow. Select the identity providers you need to support. Select the claims that you need. Most often it would be display name, email addresses and identity provider.
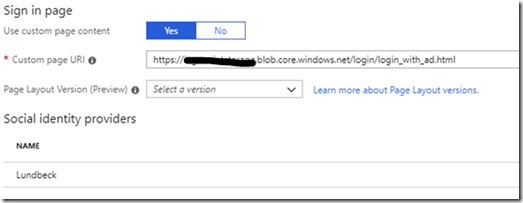
Under Page Layouts select “Use custom page content”.

Enter the url for the customized layout for the login.

Setup easy auth from the CLI
Now everything is setup and we are ready to turn on easy auth.
Setting up easy auth is as simple as a oneliner using the Azure CLI. It needs to be run for both the frontend and backend application.
az webapp auth update --name $appname --resource-group $ResourceName --enabled true --action LoginWithAzureActiveDirectory --aad-client-id $aadClientId --aad-allowed-token-audiences $url + "/.auth/login/aad/callback" --aad-client-secret $secret --aad-token-issuer-url $issuerurl
$aadClientId is the Azure AD ClientId that must be obtained from the AD
$url is the url for the app
$secret is the key generated in the AD B2C
$issuerurl is the url for the user flow in the AD (e.g. https://myad.b2clogin.com/myad.onmicrosoft.com/v2.0/.well-known/openid-configuration?p=B2C_1_SignInFlow)
Last kind of strange step
Lastly we need to set additionalLoginParams for the frontend app. Strangely this is not well supported via the CLI or Portal, so we need to use resource explorer to get the job done (https://resources.azure.com). Pick your subscription and navigate to resourceGroups/<resourcegroup>/providers/Microsoft.Web/sites/<fontendapp>/config/authsettings
Add an additionalLoginParams value with the required scopes. These are likely to be openid, offline_access and the full scope value defined in the AD B2C for the backend (e.g. "scope=openid%20offline_access%20https%3A%2F%2Fmyad.onmicrosoft.com%2Fapi%2FmyApi.ReadWrite"). Notice this needs to be url encoded.
Now you are all set. To make an http request to the backend you need to add a bearer token. This is retrieved from the /.auth/me route on the frontend. Here you also see refresh tokens and the claims that you requested.
And done…